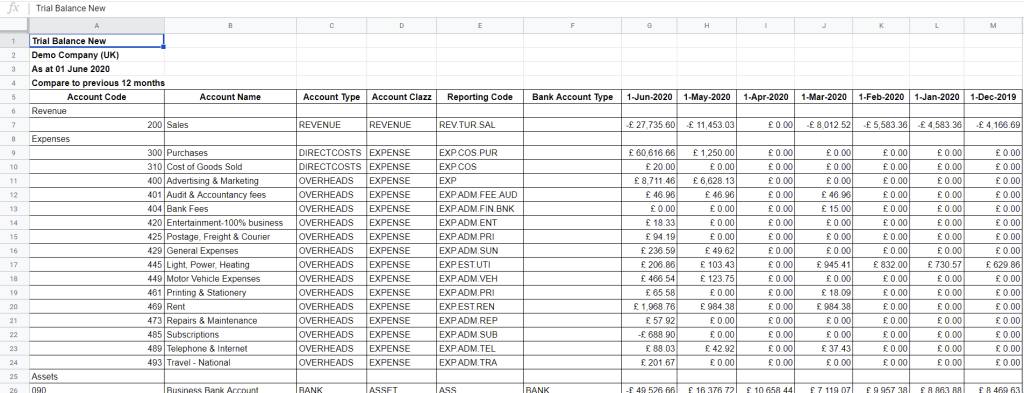
The Trial Balance report shows the balances of your general ledger accounts for your chosen date. The income and expense account balances include transactions dated from the start of your financial year to the report date you specify. Normally, this sort of report consists of debit amounts in one column and credit amounts in another, but our innovative report combines these columns so you can see the total of the credit balances in your Google Spreadsheet.
In a manual accounting system, the trial balance would draw attention to various errors that occur when transactions are journalized, posted, computed, etc. But with accounting software like G-Accon, these errors are reduced and avoidable.
How to generate a Trial Balance New report
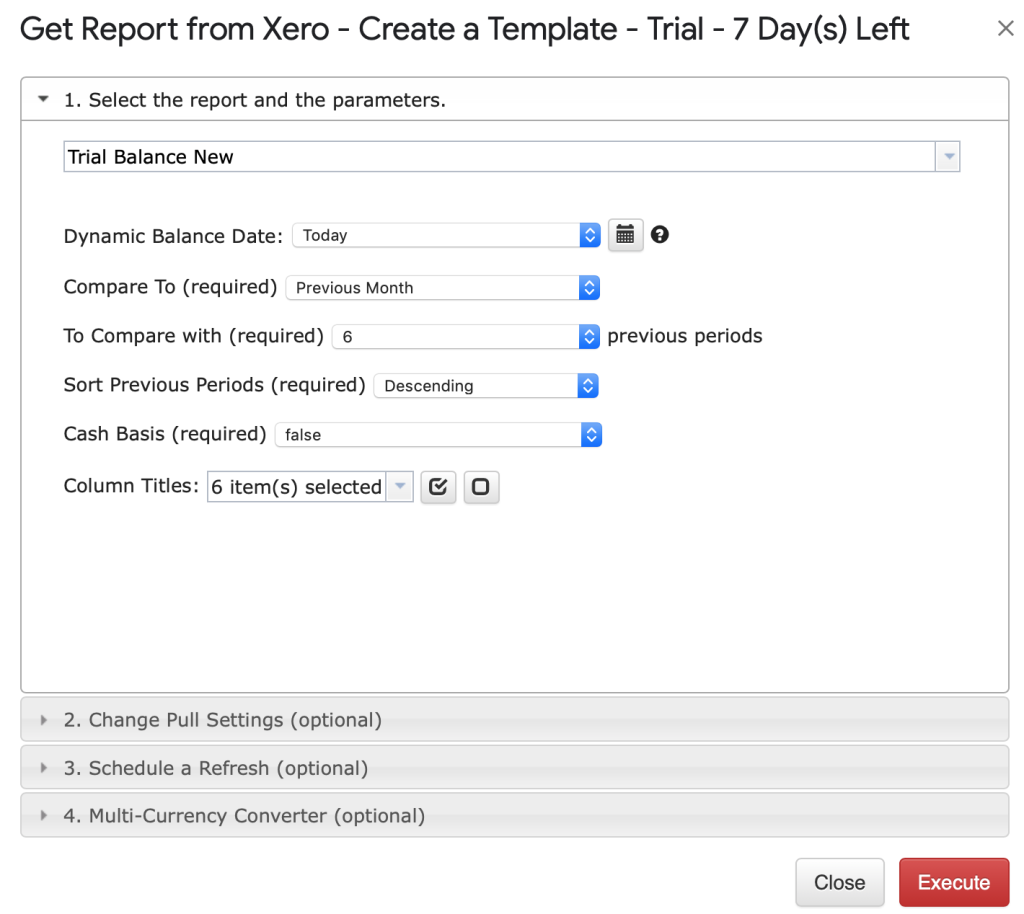
To get your accounting report data, you first need to be logged into Xero. Next, you need to go to the menu and select Add-ons -> G-Accon for Xero -> Get Accounting Reports -> Trial Balance New.
Pick the Trial Balance New option from the drop down menu.
There are some required and optional filters for the Trial Balance New report:
1. Balance Date (Date format should be DD/MM/YYYY). You can select either a static or dynamic date range to generate the report.
2. Compare To (Previous Day, Previous Month, Previous Year)
3. To Compare with (from 1 to 24) previous periods
4. Sort Previous Periods (Ascending/Descending)
5. Cash Basis (False/True)
6. Column Title. You have the ability to select your desired columns.


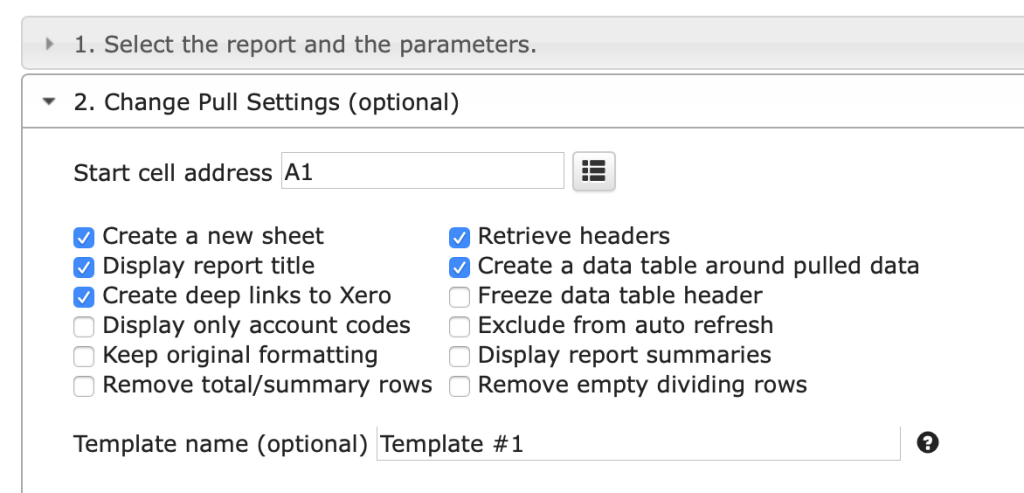
The Change Pull Setting allows you to perform the following operations:
1. Create a new Google Sheet
2. Display Report Title
3. Create Deep Link to Xero
4. Display only Account Codes
5. Keep Original Formatting
6. Remove total/summary rows
6. Retrieve Headers
7. Create a Data Table around your Pulled Data
8. Freeze your Data Table Header
9. Exclude Auto Refresh
10. Display report summaries
11. Remove empty dividing rows
You can also provide the start cell. For example, A1. Alternatively, you can provide the name of your template in the Template Name field. For example, Template #1.
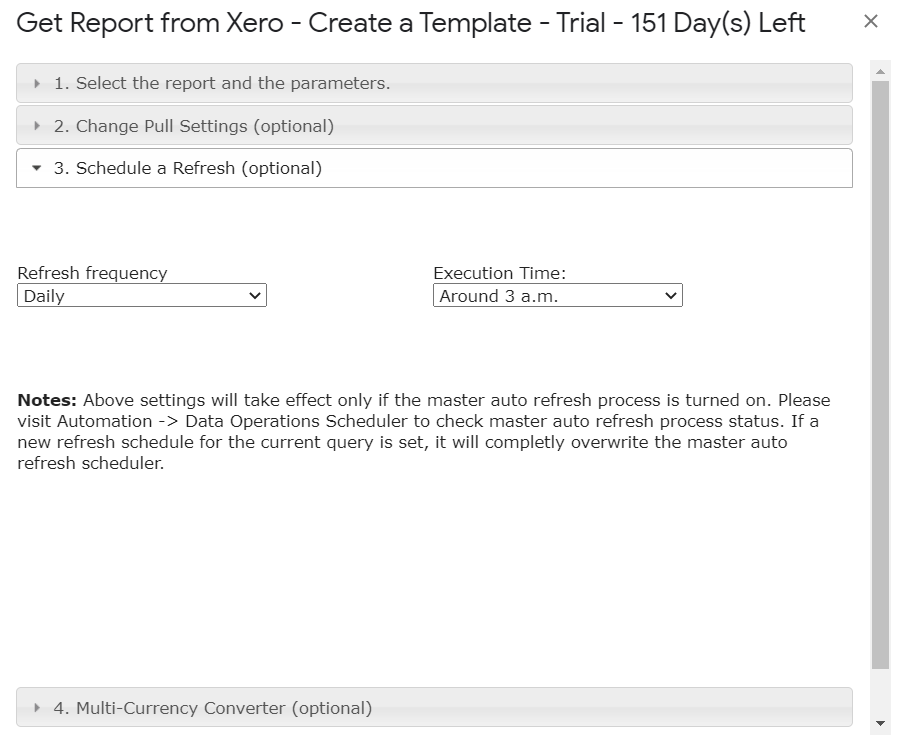
To schedule an auto Refresh, you can use the Schedule a Refresh option. The important thing to remember is that this will only work if the master auto refresh process is turned on. See the Automation process explanation for more information.

To complete the process, click on the “Execute” button. The Trial Balance New details will now show up on the Google Sheet.


%20copy.png)


